6-Ingredient No-Bake Honey Lemon Cheese Cake (vegan option)

What is it like?

- Lemon-y aroma

- Ultra-creamy

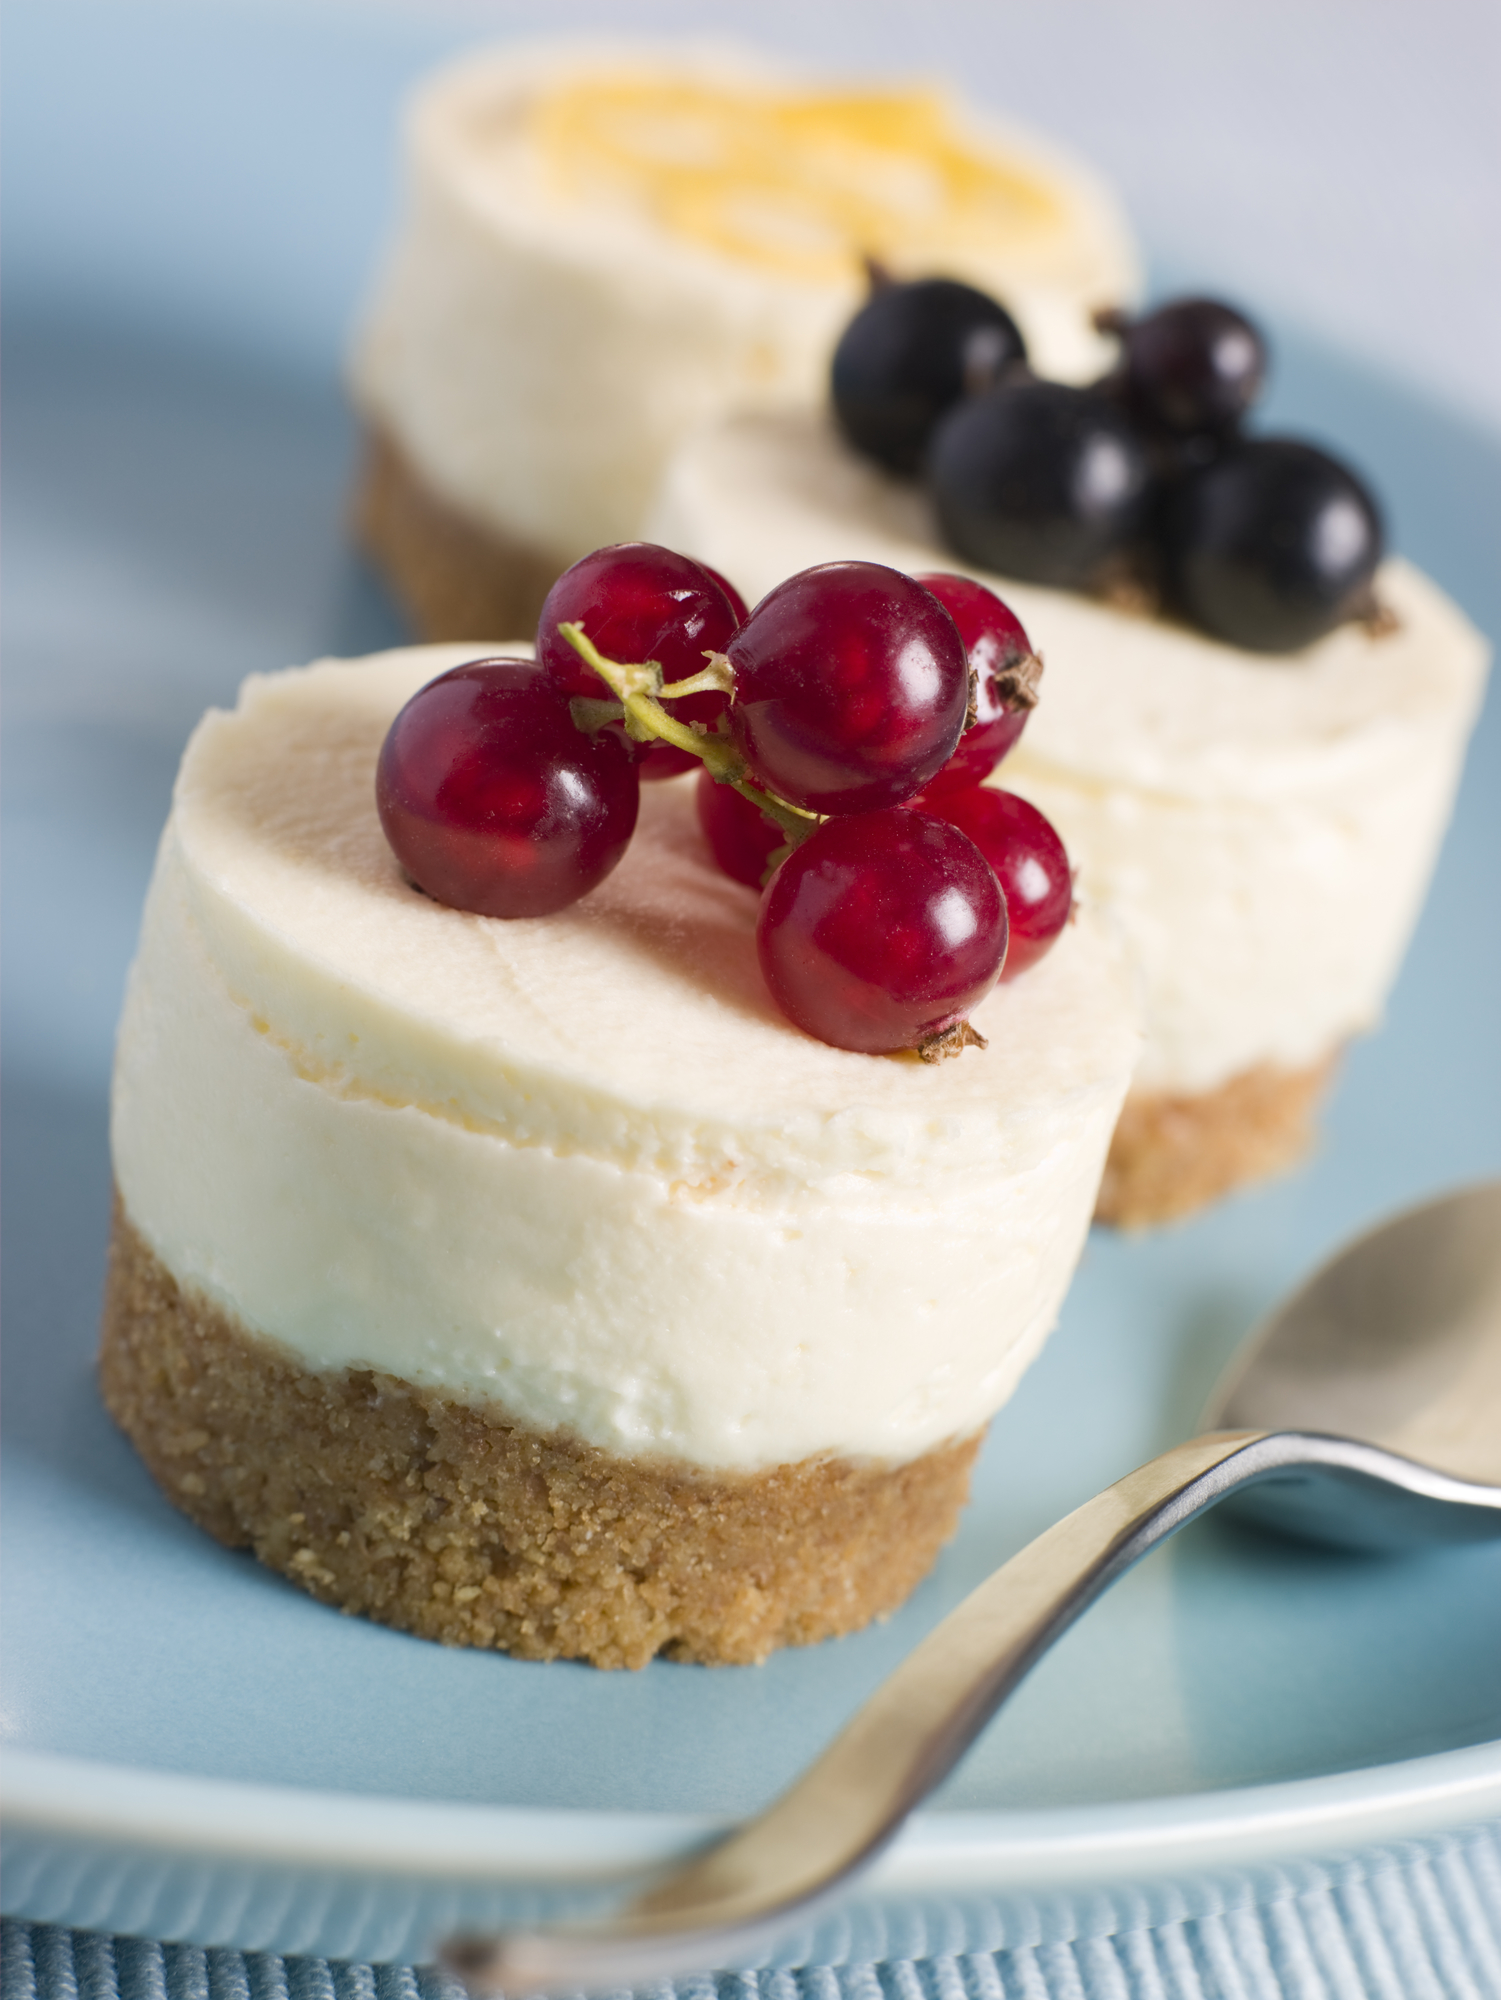
- Thick graham cracker crust (optional)

6-Ingredient No-Bake Honey Lemon Cheese Cake vegan gluten free dairy free recipe
 

Recipe

6 Servings, Prep 15 min, chilling time is 1 hour for individual servings

Because this cheesecake is not baked, it is ultra-creamy. And without a crust it takes about 5 minutes to whip together. If you would like an extra thick crust, like the one photographed above, double the crust recipe.

Crust, Optional (You can make a beautiful cheesecake without a crust)
2/3 cup Gluten free graham cracker crumbs (or Lavender Oat Cookie crumbs - you can leave out the lavender if you prefer)
2 tbsp butter
1 tbsp sugar, or more to taste (optional)

Filling
1 lb vegan cream cheese spread, 453g
1/3 cup vegan butter or butter, 92g
1/3 cup honey (or agave for vegan), warmed 120g
Zest of one large lemon (1 tbsp lemon juice, optional)

Optional: If you would like a more full lemon flavor (but slightly softer filling) add 1 tbsp lemon juice


Directions:

  1. Crust: If you are making a crust, place the graham cracker pieces in the food processor and pulse until crumbs begin to form. Measure 3/4 cup and reserve the rest for another use. Add the 3/4 cup crumbs, melted butter, and sugar to the food processor and pulse a few more times, until there are uniform crumbs. Divide and press the crust into the bottoms of six small ramekins (3 in / 7 cm in diameter). If you do not have ramekins, any small bowl or cups will do! Or if you prefer one dish, you can use a small bread pan.

  2. For the filling: Open the cream cheese. If there is any liquid on top, pour it off. Whip the cream cheese on low until it is homogenous and there are no lumps. Be careful not to over-mix. Add the warmed honey and stir. Next add the melted butter and stir in the zest. If you want to use the lemon juice as I do, it will make the cheesecake softer, but it will give it a fuller flavor. Personally, I don’t mind that it is softer, because as a no-bake cheesecake you get a softer, creamier texture than baked cheesecake anyway. However, if you’re going for a “harder” cheesecake, omit the juice and just use zest.

  3. Pour the filling into six individual ramekins or into a small bread pan. Place it in the fridge until it is cold. Overnight is best but two hours is generally enough time.

  4. Serve cold. The cheesecake is delicious with fresh, in season fruit.


Notes:

  • For the ingredients I used: Trader Joes Vegan Cream Cheese Spread and Miyoko’s Organic Cultured Vegan Butter, also available at Trader Joe’s.

  • What is most important for the crust is that you use crumbs from cookies that are crispy or crunchy. Ginger snaps should also produce a nice crust in place of graham crackers, although I have not tested them (yet!).

  • If you’d like to make a larger recipe, without the individual serving tins, double the recipe and use a springform cake pan. Allow for 4 hours of chill time in the fridge.

  • These cheesecakes are served in the ramekins for a simpler preparation. However, if you’d like them be able to pop out of the dishes you’ll have to use small individual cake rings.

7-Ingredient Coconut Lime Cheesecake

What is it like?

- Gentle Lime Flavor

- Cool & Refreshing

7-Ingredient Coconut Lime Cheesecake vegan gluten free dairy free recipe
 

Recipe

About 6 servings, prep 20 minutes, cool time: 2 hours

Crust, Optional (You can make a beautiful cheesecake without a crust)
10 small pitted dates, 60g, diced
1/2 cup walnuts or pecans

Filling
1 lb cream cheese,
1/4 cup coconut cream, 70g
1/2 cup sugar, 100g
3 eggs
1 1/2 tbsp lime juice, plus the zest of one lime
optional: 1/2 tsp coconut extract


Directions:

  1. Preheat your oven to 325F/165C.

  2. Cheesecakes without crusts are still delicious, especially paired with your favorite in-season, ripe fruit. However, if you’d like to make the crust, dice the dates and add them to the food processor. Blend until a past forms. Next add the walnuts or pecans and pulse until some of the nuts are ground and some are small pieces (the small pieces add a nice crunch). You should be able to squeeze the mixture and it will feel like a dough. If needed, you can add more date pieces.

  3. To make the filling, use a whisk or handheld mixer and whip the cream cheese on low until it is homogenous, being careful not to over mix. Add the coconut cream and sugar and whip until combined. Mix in the eggs one at a time. Stir in the rest of the ingredients.

  4. Optional water bath: usually cheesecake is baked in a water bath so that you end up with gentler cooking to produce a creamier, more consistent texture. However, this is not absolutely necessary. If you’d like to use a water bath boil 1.5 quarts of water. Place your cheesecake in a larger pyrex or pan with sides that are tall, ideally 2 in / 5 cm high. Pour enough boiling water into the empty pan so that the water is about .75 inch / 2 cm high.

  5. Put the cheesecake into the oven (with the water bath) and bake until the top turns a rich golden color. The middle will still be pale. This cheesecake will bake past the point that you would bake a dairy cheesecake.

  6. Allow the cheesecake to cool. Then place it in the fridge until it is cold, at least two hours. Serve cold with fresh fruit or whipped coconut cream.

Peanut Butter Milkshake (vegan)

What is it like?

- Thick & Peanut Butter-y

- Cool & Refreshing

vegan peanut butter milkshake gluten free dairy free recipe
 

Recipe

I love this recipe. It isn’t too sweet, and since it’s vegan and it doesn’t call for ice cream, it is kind of like a thick refreshing nog.

About 6 servings, prep 7 minutes, cool time: 2 hours

3 tbsp peanut butter, 58g
1/4 cup sugar, 50g (or too taste)
9.5 oz oz coconut milk (runny part), 270g
12 oz silk tofu, 225g

Optional: 1 tsp vanilla, dash of salt


Directions:

  1. Heat the coconut milk and tofu in the microwave until warm. Then add all of the ingredients to the blender and blend for about one minute.

  2. Pour the mixture into an airtight container and store in the fridge. It can be served once it is cold. It will keep for 3 days in the fridge.

3-Ingredient Za'atar Spice Mix

What is it like? 

- Lemony sumac flavor

- Aroma of fresh thyme and toasted sesame seeds
 

za'atar recipe
 

Recipe

In Palestine the herb that is used for the za’atar spice blend is known by the same name, za’atar, and it has a flavor most similar to oregano. However, like some other cooks, I prefer the mellower flavor of thyme. Below is my version of za'atar, but feel free to make it your own and substitute or add oregano, savory or marjoram.

2 tbsps toasted sesame seeds
1 tbsp fresh thyme leaves, finely chopped
1 tbsp sumac, or to taste
salt, to taste (optional)

Directions:

Mix all of the ingredients together and store in an airtight container in the fridge.

Notes:
If you like, other spices can be added to this mix, like cumin or black pepper. Have fun with it. When testing it, keep in mind that it’s a topping so it will taste strong unless it is paired with food.

3-Ingredient Chocolate Pudding

What is it like?

- Silky smooth

- Rich & Chocolaty

3 ingredient chocolate pudding gluten free dairy free recipe
 

Recipe

This recipe is super simple and incredibly delicious. It’s the perfect dish to prepare when you don’t have time to cook/bake or when it’s too hot to turn the oven on.

About 6 servings, prep 5 minutes, set time: 2 hours

12 oz chocolate chips, 340g (be sure to use vegan chocolate if you are vegan)
1 cup coconut milk, 228g (see note)
15 oz silk tofu, 425g
1/8 tsp salt, optional

Smaller recipe, serves 2:
3 oz or 1/2 cup chocolate chips, 85g
1/4 cup coconut milk, 57g
4 oz silk tofu, 113g
Dash of salt, or to taste


Directions:

  1. Place the chocolate chips in a large bowl. Pour the coconut milk over the chocolate chips.

  2. Microwave for one minute. Stir the chocolate mixture. Microwave for another 30-seconds and stir afterward. Repeat if the chocolate is not melted.

  3. Put the milk tofu in a microwave safe bowl and microwave until warm, for about one minute. Blend the silk tofu in blender for 30 seconds. Then pour it into the chocolate mixture and whisk until the mixture is completely smooth. Put plastic wrap or a reusable waxed cloth over the bowl and refrigerate until the pudding is cold. If you need the pudding to firm up within an hour or two, pour it into individual serving dishes.

This pudding keeps in the fridge for three days. It is delicious as is or with fresh berries.

Note:
This pudding ends up tasting very creamy and rich with the lower fat part of the coconut milk. I pour out the runny part of the coconut milk and then reserve the harder cream that is on top for another use, like whipped coconut cream.

I also prefer to use to Thai Kitchen coconut milk. Coconut milk varies a lot across brands and at this point in time, I think it’s a decent product.

You can also use any kind of chocolate that you like. Just keep in mind that the type of chocolate will change the flavor and consistency some. I first tested this recipe with Trader Joe’s gluten free chocolate chips and it was excellent, but for a higher quality chocolate you may want to choose a different brand.