Fluffy Blueberry-Lemon Pancakes - with Buckwheat (Vegan, Paleo)

What are they like?

-rich lemony aroma

-fluffy and full of blueberries

-filled with nutrient-dense buckwheat flour

The Best Lemon Blueberry Pancakes Gluten Free Dairy Free vegan paleo
 

Recipe

These pancakes are my favorite. The lemon and blueberry marry so well together that, like me, they may become your go-to pancake. The deeply nutty and aromatic qualities of buckwheat are as satisfying as they are healthy, offering ample nutrients compared to refined grains. Dig in and enjoy!

Makes 12 pancakes, prep 10 min, cook time ~12 min

dry
1 1/3 cups buckwheat flour, 179g
2 1/2 tbsp (30g) brown sugar (substitute maple syrup or date sugar for Paleo)
1/2 tsp cinnamon (optional)
1 tsp baking powder (substitute baking soda for Paleo)
1/2 tsp baking soda
1 tsp psyllium husk powder (omit if Paleo)
1/4 tsp salt

Scant 2/3 cup blueberries, 60g, frozen or fresh

wet
2 tbsp olive oil, 26g
1 1/2 (375g/375ml) cups nondairy milk (can use Paleo nondairy milk if you’re Paleo)
1/4 (60g) cup lemon juice, plus zest (about 2 lemons)

Directions:

  1. Place two large skillets on the stove, so they are ready to use when needed (you can use one but I always prefer to cook pancakes with two skillets (see note). It makes it go more quickly and keeps them fluffier.

  2. In a large bowl whisk together the dry ingredients, except for the blueberries. Place the blueberries in a measuring cup and, if using frozen blueberries, sprinkle 2 tsp of the flour mixture over the berries. Jostle the blueberries to fully coat them.

  3. Whisk together the wet ingredients (the nondairy milk, olive oil, and lemon juice) and using a spoon stir it into the dry ingredients. Once the flour is almost mixed in, add the blueberries, and stir just until the flour is all mixed in.

  4. Turn the burners to medium and allow them to heat up for 1 minute before adding a teaspoon of oil to coat each pan. Place mounds of pancake mix into each pan and allow to cook until air bubbles start to pop and the edge starts to look cooked. Turn the burner down a little if necessary. Then flip the pancakes and cook for about 2-3 minutes until done.

These pancakes make excellent leftovers. Enjoy them with nut butter and maple syrup, sliced fruit, or plain.

Notes:

I prefer to turn the burners on right before I add the wet ingredients. This way the pans have 1 minute to heat up before the pancakes are mixed together and ready to cook. When the mixture spends time sitting in the bowl, especially for the paleo version, the baking soda reacts with the acid from the lemon juice causing air bubbles. You want this reaction to happen while they are cooking in the pan! This is another reason to use two pans, it keeps the pancakes fluffier because they spend less time sitting in the bowl.

Super Seedy Crackers

What are they like? 

- Hearty

- Packed with nutrients

- Full of flavor
 

The cracker on the right is a variation of crisp bread with the seeds on top. The recipe below is all seeds!

The cracker on the right is a variation of crisp bread with the seeds on top. The recipe below is all seeds!


Recipe

This recipe is adapted from Oh She Glows Everyday by Angela Liddon. In her book they are called “Endurance Crackers”. They are packed with nutrients, flavorful, and calorie dense.

Serves 10, Prep 10 min, baking 30-40 min 

1/4 cup chia seeds, 40g
1/4 cup sunflower seeds, 40g
1/4 cup pumpkin seeds, 30g
1/4 cup sesame seeds, 35g
scant 1/2 cup warm water, 70g
1/8 teaspoon fine sea salt, plus more for sprinkling

optional:
1/2 tsp paprika
1/4 tsp chili powder
1 1/2 tbsp honey
1 tbsp lime juice, plus zest of one lime (can substitute lemon)

Directions:

  1. Preheat the oven to 350F/175C.

  2. Mix all of the ingredients together in a large bowl, adding the warm water last. Stir to combine.

  3. Allow the seeds to rest while they absorb the water. Oil three pieces of parchment paper.

  4. When the seeds have absorbed all of the water, divide the mixture between two pieces of parchment paper. Place the third piece of parchment paper oil-side down onto the mixture. Using a rolling pin, roll out the mixture as thin as possible, 1/8-1/4 inch thickness. Repeat with the rest of the mixture.

  5. Slide each of the the rolled out crackers onto a cookie sheet and bake for about 30 minutes. Then using a spatula, carefully flip the crackers and bake for about 20 minutes or until they are golden*. Note that it is easy to burn these crackers so it is better to take them out early and rebake them later if needed. Allow the crackers to cool completely and then break them up into desired sizes. If they are not crunchy, put them back into the oven for a few more minutes. Store in an airtight container for one week.

*At this point, you may want to tear the crackers up into large pieces to help them cook evenly. However, they are hot so be careful.


Buttery Crackers

What are they like? 

- Buttery & Crispy

- Excellent solo, dipped in nut butter, or served with hors d'oeuvre
 

These crackers can be made thin or smaller and thick. If they are thick, you’ll want to cut them out before baking. If you like, you can press seeds or spices into the top of the dough prior to baking.

These crackers can be made thin or smaller and thick. If they are thick, you’ll want to cut them out before baking. If you like, you can press seeds or spices into the top of the dough prior to baking.


Recipe

These crackers are delicate, rich, and crispy. I think of them as a fancier cracker but that doesn’t mean they are harder to make than other crackers—quite the opposite. This recipe was adapted from Smitten Kitchen; and their recipe was adapted from King Arthur Flour Whole Grain Baking cookbook. The glaze is delicious and recommended but they are also good without it. These crackers are delicious solo or served with dips or nut butters.

Serves 4, Prep 10 min, baking 20 min 

3/4 cup flour mix (96g) OR 3/4 cup brown rice flour, plus 1/2 tsp psyllium husk powder or xanthan gum
1/4 cup plus 2 tbsp oat flour, 36g
1 1/2 tbsp sugar, 20g
1/2 sea salt, 3g
1/4 teaspoon paprika
4 tbsp unsalted butter or buttery spread such as Earth Balance, 55g

2 tbsp cold water, 30 ml

Glaze (optional)
1 1/2 tbsp maple syrup, 23g (or other honey/syrup)
1/4 tsp molasses
1/8 tsp fine sea salt
1 tbsp hot water

Directions:

  1. Preheat your oven to 350F/ 175C. Place a piece of oiled parchment paper on the back of a cookie sheet. Spray a second piece of parchment paper.

  2. In a medium sized bowl whisk together the dry ingredients: the flour mix, oat flour, paprika, sugar, and salt.

  3. Work the cold butter or vegan spread into the mix using your hands, fork, or a food processor until the mixture resembles cornmeal with some larger pieces of butter.

  4. Start by adding 1 1/2 tbsp (or 20ml) cold water. You may need to add more. Add just enough water until the dough forms a ball when pressed together. You want the dough to form a ball but you don’t want it to be too sticky or too dry and crumbly.

  5. Place the dough on the parchment paper on the back of a cookie sheet. Place the second piece of oiled parchment face down on the dough and using a rolling pin roll the crackers out as thin as possible 1/8-1/4 inch.

  6. Slice the crackers using a knife or pizza cutter. Dock the crackers using a fork. If making the glaze, mix tougher the ingredients in a small bowl and using a pastry brush, brush the liquid onto the dough.

  7. Bake them for about 20 minutes until the edges brown or until they are lightly golden on top. Allow the crackers to cool completely before eating as this will ensure that they are crunchy. If the cooled crackers are not crispy, they can be put back into the oven and baked for additional time.

Once cooled, store in an airtight container at room temperature.

Notes: 
Crackers can easily be undercooked or overcooked so watch them carefully once they start to brown. You want them to be cooked enough to be crisp but not burned. You may need to remove the outer crackers midway through baking if they become too browned.

Gluten Free Dairy Free Norwegian Crisp Bread

What are they like? 

- Hearty

- Packed with seeds

- Full of nutrients
 

The cracker on the right is a variation of crisp bread with the seeds on top. The cracker above is lighter in color than the cracker recipe below because the recipe calls for buckwheat.

The cracker on the right is a variation of crisp bread with the seeds on top. The cracker above is lighter in color than the cracker recipe below because the recipe calls for buckwheat.


Recipe

These crackers are super hearty, packed with nutritious ingredients, and covered in flavorful seeds.

Serves 8, Prep 10 min, baking 30-40 min 

2/3 cup buckwheat flour, 100g
1/3 flour mix, 42g (try leaving out for paleo or substitute coconut flour)
1/4 cup flax seeds, 35g
1/2 cup sunflower seeds, 1/2 cup pumpkin seeds, 1/4 cup sesame seeds, about 145g / 355 ml (see note)
1/4 tsp cumin powder and 1/2 tsp fennel powder (optional)
1/2 tsp fine sea salt
2 tbsp olive oil, 25g
1/2 cup warm water (or more if needed), about 115g
1 tbsp honey or sugar for vegan (optional)

Directions:

  1. Preheat oven to 350F/180C. Place a piece of oiled parchment paper on the back of a 17 x 11 1/2 inch cookie sheet. Spray a second piece of parchment paper.

  2. In a large bowl mix together all of the flours, seeds, spices, and salt. Add the oil and mix. Then add the water. Start with scant 1/2 cup and mix, adding more if necessary, until the dough will form a ball when pressed together. The dough will be on the tacky side for cracker dough (it will feel a little sticky).

  3. Place the dough on the oiled parchment paper and place the second piece of oiled parchment paper face down on the dough and roll the crackers out as thin as possible 1/8-1/4 inch.

  4. Bake for about 20 minutes until the edges brown. Then flip the crisp bread over and break it up into five large pieces. Bake for about 15 more minutes, or longer if needed.

  5. Allow the crisp bread to cool completely before eating as this will ensure that they are crunchy. If the cooled crackers are not crunchy, they can be put back into the oven for bake and baked for additional time. Once cooled, store in an airtight container at room temperature.

Notes: 
- For a more elegant cracker reserve about one third of the seeds and press them into the rolled out dough just before baking. I prefer to use roasted seeds, but this is up to you. The seeds on top will get roasted when the crackers bake.
- Crackers can easily be undercooked or overcooked so watch them carefully once they start to brown. You want them to be cooked enough to be crisp but not burned. You may need to remove the outer crackers midway through baking if they become too browned.

gluten free dairy free quinoa and corn crackers recipe

Rich Walnut Almond Cake

What is it like?

-roasted almonds and walnuts

-a rich crumb

-delicately spicy

walnut almond cake gluten free dairy free recipe
 

Recipe

This recipe was adapted to be gluten free and dairy free from David Leite’s recipe ‘“Russians” Nut Cake’ from The New Portuguese Table. It’s deliciously moist and has that unmistakable aroma of roasted almonds and walnuts. It’s simple to make and stays fresh for several days. It’s a go-to in my home. See note for Paleo.

dry
1/3 cup blanched almond flour, 43g
2/3 cup ground walnuts*, 85g OR grind 1 cup (100g) walnuts with 1 tbsp (23g) flour mix)
1/4 cup flour mix, 31g (OR cassava flour for Paleo)
1 tsp baking powder, 5g
1 tsp (3g) psyllium husk powder or xanthan gum (omit if Paleo)
1/8 tsp ground cloves
1/4 tsp salt
1/2 tsp ground coffee, optional

wet
1/4 cup plus 1 tbsp sugar, 63g (OR date sugar for Paleo)
1/4 cup (47g) olive oil (or preferred oil) OR 5 tbsp butter
3 large eggs
1 tbsp water, 12g

Buttercream
1 cup (225g) butter, at room temperature (or use 3/4 cup Earth Balance for dairy free)
2 3/4 (343g) cups powdered sugar, or to taste
dash of salt

Directions:

  1. Preheat the oven to 350F/180C. Grease an 8x8 baking dish.

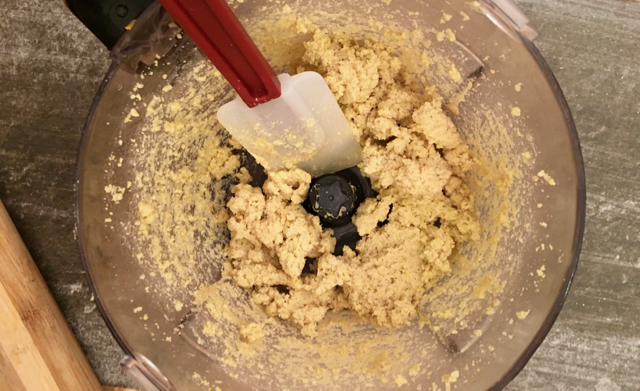
  2. Grind 1 cup walnuts with 1 tbsp flour mix in the food processor. It’s fine if there are some stray walnut pieces left over as long as most of it is a flour. The walnut pieces are an excellent addition to the cake.

  3. In a large bowl whisk together the dry ingredients.

  4. In a medium bowl whisk together the wet ingredients.

  5. Add the flour mixture to the wet mixture and whisk just until most of the lumps are gone. Pour the batter into your baking dish and bake for about 20 minutes or just until the middle springs back when pressed. Allow to cool completely before frosting.

  6. While the cake bakes, prepare the buttercream. Stir together the powdered sugar and butter. If your powdered sugar has lumps you may want to sift it first. If you like your frosting light, you can use a mixture to whip it on high for a few minutes.

  7. Frost a cake to a thickness you desire. Left over frosting can be frozen for several months.

  8. If you like you can get creative with the frosting. I chose to cut this cake into small squares and then piped a rosette onto each square.

  9. This cake will stay moist and fresh for three days if kept in the fridge.

    Note: If your food processor is large, I recommend grinding twice the amount of walnuts so that they grind finely. The ground walnuts that you don’t need can be frozen and used for another purpose. Or in may case, for another one of these cakes!